Open Request Form

BULLFROG SPAS DELIVERY & INSTALLATION GUIDE

NOTE: Please refer to your owner’s manual for the most accurate and up-to-date information for your particular spa model and year. 

BULLFROG SPAS DELIVERY & INSTALLATION GUIDE

NOTE: Please refer to your owner’s manual for the most accurate and up-to-date information for your particular spa model and year. 

Foundation Requirements & Considerations

General guidelines

Select a structurally sound flat surface that is reasonably level to serve as your spa’s foundation to prevent serious damage to your spa. A foundation that shifts or settles may cause stress to the spa shell.


The foundation that your spa rests on must have a weight bearing load capability of supporting the weight of your spa, its water, and the people using it. The maximum filled weight of a portable spa can be as much as 6,000 lbs (2,722 kg), and a swim spa can be close to 20,000 lbs (9,072 kg) plus the weight of the occupants that use the spa. You can find the spa weight by visiting the spa model page on our website or by asking your spa dealer.


To prevent serious damage to your spa, it is important that the spa foundation be supported by a flat, stable, and consistent subsurface. Bullfrog Spas highly recommends consulting a qualified, licensed contractor prior to the installation of any spa foundation. For assistance, contact your authorized Bullfrog Spas Dealer.

Recommended foundation materials

Recommended flooring materials include a concrete pad, concrete pavers or bricks, pea gravel, crushed rock (1.5” [3.81cm] or more), or a reinforced deck. Additionally, your authorized Bullfrog Spa dealer should sell or recommend pre-formed spa pads.


Concrete foundations should be a minimum of 4” (10.16cm) thick and should be reinforced with either rebar or mesh. For electrical grounding purposes, the rebar or mesh should be attached to a bond wire.

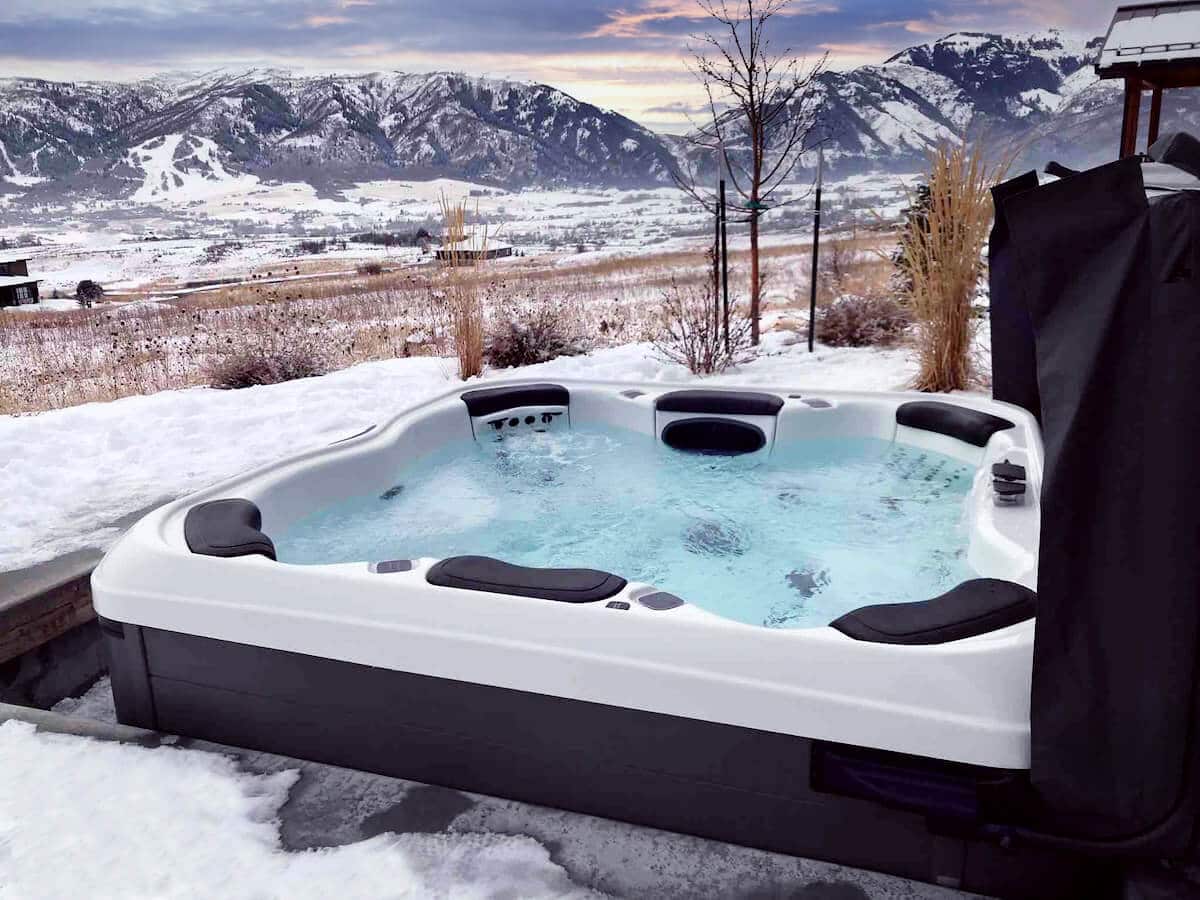
How level does a hot tub need to be?

If your spa’s pad is slightly sloped, it will not affect the performance of the spa or its structure; however, there should be no dips, sags, or unevenness in the pad. Most patios are built to slope away from the house for drainage purposes. There should be a maximum of ½” (1.27cm) slope in an 8‘ (2.44m) run. Do not use shims to level the spa, this could create tension on the spa shell which might result in damaging your spa.


Because your spa pad must provide continuous support for the entire base of the spa, you should never level it with shims. If it is necessary to level your spa, make sure the entire spa’s structure is fully supported, both in the center as well as the outer edge. When leveling your spa, there should be no voids beneath it. Contact your authorized Bullfrog Spa dealer before making any leveling adjustments. Structural damage to the spa resulting from incorrect installation, placement on an inadequate foundation, or improper leveling will void the spa’s warranty.

Electrical Requirements & Considerations

electrical-breaker
electrical-wiring

*Please see owner’s manual for full electrical requirements, definitions, conversions, and diagrams.


You will need to ensure that you have the appropriate space equipped with electrical source. You will usually need to hire an electrician to wire your hot tub before it can be used. Depending on codes where you live, an electrician can either hook up the tub once it’s delivered, or set up the wires ahead of time. Some hot tub companies can help finalize the wiring when your tub is delivered.


The installation of all spas must be in accordance with national and local wiring rules. Always have a licensed electrician perform the electrical installation. Each Bullfrog Spa is manufactured and tested to a standard that provides maximum protection against electrical shock. Improper wiring may prevent the spa from operating safely which could result in electrical shock, injury, or death. Improper wiring could also lead to a malfunction of the spa’s equipment and risk of fire.

Hiring an electrician

If you are needing recommendations for a licensed electrician, your local dealer should be able to provide help. It can be beneficial to use an electrician recommended by your dealer as you know they will have done electric work for hot tubs before. 

Wiring connections & Amperage

See Owner’s Manual for the available wiring configurations and recommended ratings amperage for each Bullfrog Spa model.

240V

Most Bullfrog Spas are equipped with 240V~/60Hz equipment. These permanently-connected 240V~/60Hz spas require a GFCI protected, 4-wire (Line 1, Line 2, Neutral, and Ground), 240V~/60Hz, 50A or 60A, Single-Phase, dedicated electrical circuit. It is important that this circuit is dedicated (not being used by any other electrical appliance) or the spa may not function properly. Spa models with 3 jet pumps (S200, M9, M8, and A9L) require a 60A service for full functionality. Installation must be in accordance with all national and local wiring rules.

120V

Some smaller Bullfrog Spas models (A5L, X5L, STIL5, X6R) are available to be ordered with a 120V~/60Hz cord-connected Installation. Cord-connected spas have already been converted to operate on 120V~/60Hz power at the factory and come with approximately 15‘ (4.57m) of usable power cord (the maximum length allowed) attached to the spa. This factory installed power cord comes with a built-in GFCI breaker.


WARNING: Never connect to an extension cord.

Electrical service wire size, length, and type

The size of wire required to supply the spa with power is dependent upon the length of the electrical run and should only be determined by a licensed Electrician. Installation must be in accordance with all national and local wiring rules. All wiring must be copper to ensure adequate connections. Never use aluminum wire.


Please see your owner’s manual for electrical chaseway diagrams.

Access to circuit breakers

For service purposes, allow easy access to the circuit breakers in the electrical service panel (permanently connected models), or to the interrupter switch on the end of the power cord (cord-connected models).

Wiring entry points

Each Bullfrog Spa is manufactured with three electrical access chase ways in its base to allow conduit to be run to the spas control system. These chase ways are marked by stickers indicating access points.

Electrical safety requirements

The installation of all spas must be in accordance with national and local wiring rules and with applicable permits consistent with local regulations. A licensed Electrician must perform the electrical installation and GFCI test procedure. Each Bullfrog Spa is manufactured and tested to a standard that provides maximum protection against electrical shock. Improper wiring may prevent the spa from operating safely which could result in electrical shock, injury, or death. Improper wiring could also lead to a malfunction of the spa’s equipment and risk of fire. When considering a location for your spa, consult with a licensed Electrician pertaining to the following:

Overhead Powerlines

Based upon the national and local wiring rules that apply to your area, you will need to install your spa at the required minimum horizontal and vertical distances from all power lines.

Service Disconnect

Based upon your area, a disconnect device must be incorporated into the fixed wiring in accordance with national and local wiring rules. If the national and local wiring rules permit, a GFCI Sub-Panel may be used to substitute the service disconnect, providing that it is located within the same parameters.

Electrical Outlets, Switches, and Devices

Based upon the national and local wiring rules that apply to your area, you must install your spa at the required minimum distance from all electrical outlets, switches, and devices.

Bonding

Based upon the national and local wiring rules that apply to your area, the Control System Box located inside the equipment compartment of your spa must be bonded to all metal equipment, handrails, fixtures, enclosures, pipe, or conduit that are located within the maximum specified distances. The bonding is to be connected to the ground lug connector on the exterior surface of the Control System Box and all metal items previously described. 

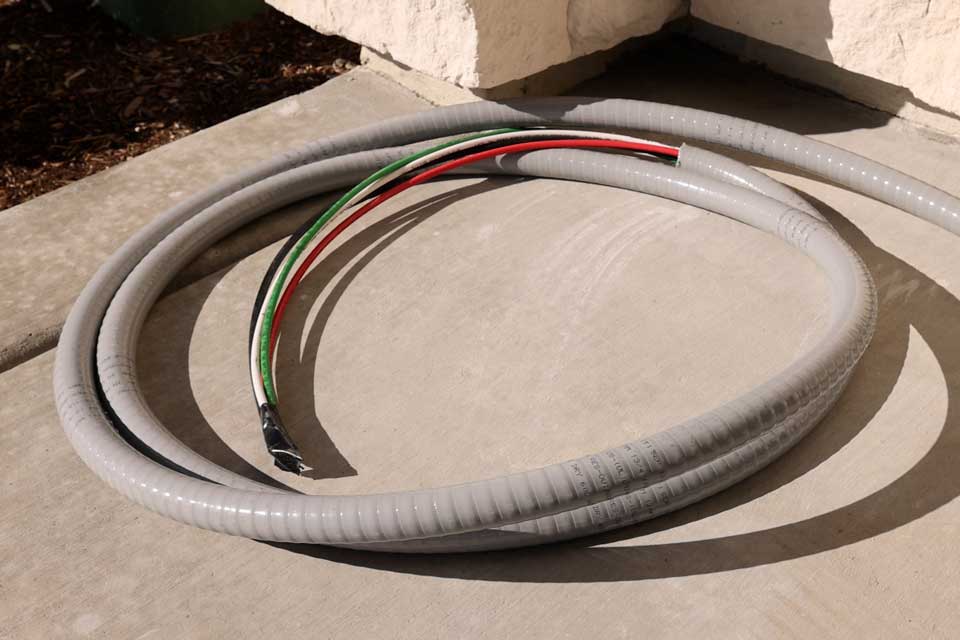
GFCI hot tub wiring diagram

In addition to the diagram that follows, please reference the owner’s manual for additional wiring diagrams.

* If connected to a 3 wires system, the heat.wave and accessories will not operate at 240 V.


Insert each wire into the appropriate socket of the main entry terminal block according to the color code indicated on the sticker. Use a flat-head screwdriver to tighten the screws on the terminal.


After making sure wires are securely connected, push them back into the box and replace the cover. Do not over tighten cover screws (torque to 8 in. lb max {0.9 N.m}).


Connect the bonding conductor to the bonding lug on the front of the spa pack (a grounded electrode conductor should be used to connect the equipment grounding conductors).


NOTE: On initial connection the installer is prompted for electrical configurations. The Low-Level setting is selected by the installer. The Phase and Amperage is set automatically. Default settings should be confirmed by the installer to match the actual phase and amperage at the spa’s installation location. In rare occasions it may be necessary to adjust the Phase and Amperage setting to match the actual service available at the installation location using the Electrical Configuration instructions for your spa’s specific control system. The “Input Amperage” for a 60A service is 48. The “Input Amperage” for a 50A service is 40.

Location/Space Requirements & Considerations

Your home most likely offers multiple sites where your spa may be installed. Use the information presented in this section to assist you in carefully selecting the site that works best for you. It is your responsibility to choose and prepare the site properly before delivery, so you will experience a smooth and efficient delivery as well as obtain optimal use and full enjoyment of your spa.

Service compartment access

Some people choose to install tile or custom wood around their spas. If you are installing your spa with custom trimming, remember to allow access for service. Should your spa need service, a technician may need to remove the spa’s equipment compartment door or side panels, or access the spa from beneath. Leave at least 24 inches of space in the front for A, X, and STIL spas. M Series spas will need 24 inches of space in the front as well as room on the front-left corner.


Also, it is always best to design special installations so the spa can still be moved, or lifted from the ground.


For service purposes, also allow easy access to the circuit breakers in the electrical service panel (permanently-connected models), or to the interrupter switch on the end of the power cord (cord-connected models).

Spa dimensions

Most hot tubs are square or rectangle and between 6 and 8 feet in external dimensions. The larger the spa, the more people it will generally accommodate. It’s good to measure the space where you intend to place your spa before shopping. Also, keep in mind it’s sometimes necessary to leave an additional space of 1 to 2 feet around at least 1 to 2 sides of the spa to accommodate accessories like cover lifters and to allow for access.


Spa dimensions for each model can be found on their individual spa model page on our website, in the owner’s manual.

Space for accessories

Make sure to plan on leaving space for any spa accessories you’ll have with your hot tub. Here is a list of common accessories and their dimensions.

Cover Lifter

If using a cover-lifting mechanism, allow up to 24” (.61m) of clearance behind the spa. CoverMate I requires just 10 to 15 inches of clearance behind the spa and 5 inches on each side. CoverMate III requires just 6 inches of clearance behind the spa and 5 inches on each side. Check with your authorized Bullfrog Spas dealer for the exact clearance requirements for your cover-lifting mechanism.

Spa Steps
  • Swim Series Steps: 60″ D x 34.5″ W x 56.75″ H (including rail)
  • M Series Steps: 29″ D x 54″ W x 15.5″ H
  • Premier Step: 29.5″ D x 34.5″ W x 15.5″ H
  • SelectStep: 20” D x 30” W x 14” H (2 Step option); 40” D x 30” W x 30” H (3 Step option)
  • Durastep: 26″D x 15″H x 27″W
Other Accessories

Other common accessories to plan for include side tables, towel racks, and handrails. Please check with your dealer or the accessory’s manufacturer for dimensions.

Outdoor installations

Most hot tubs are installed outdoors, either free-standing above ground or in-ground. Here are some tips when placing your spa outdoors to help protect your spa from the elements and to give yourself the best experience possible when enjoying your spa.


  • Avoid areas where excessive water may contact your spa such as sprinklers or under roofs without rain gutters.
  • Prevent dirt, sand, and foliage from being tracked into the spa by using concrete, pavers, or a stone path to access your spa.
  • Avoid areas of direct, prolonged sunlight where possible to avoid fading of hot tub exterior surfaces and possible damage.
  • Avoid placing the spa under trees and spill paths from gutters to prevent debris and foliage from collecting in the spa.
  • Avoid installing the spa in a pit or low area where water may accumulate and damage the spa or its equipment. Choose a site where water will drain away from the spa. Your spa contains an equipment compartment, which houses all of its electrical components. Allowing water into the equipment compartment can damage the electronics, or may result in tripping your spa’s circuit breaker. For 120V~/60Hz, cord-connected spas, avoid plugging your spa into an electrical outlet that is susceptible to water. Likewise, avoid positioning the spa’s electrical cord as to allow water to enter the cord’s interrupter switch.
  • Consider electrical wiring logistics. Most hot tubs are hard wired by an electrician and the longer the run of wire to the spa the more it can cost in materials and labor.
  • Consider the view you’ll have from your spa as well as how much privacy the surrounding area will provide.
  • To maximize the energy efficiency of your spa, make sure the spa has a strong foundation and place it close to your home or other wind-stopping barriers.
  • If you live in an area with cold winters, consider placing your spa close to the entry of your home to minimize the time spent in the cold when leaving and entering your spa.
  • Check national and local codes about restrictions that require fencing or childproof gates.

In-ground installations

indoor hot tub

Due to landscape design or accessibility considerations some customers prefer to install their spa either completely or partially below grade. In-ground installations allow the customer or landscape designers to surround the spa with material that matches the design aesthetics of the home and/or yard (concrete, brick pavers, stone, wood, etc).


When designing below grade installations please note the following to ensure a peaceful and enjoyable spa ownership experience.

Service Access

Should your spa need service, a technician may need to remove the spa’s equipment compartment door and/or side panels or access the spa plumbing or equipment.


Access for most Bullfrog Spas service needs are along the front of the spa in the equipment compartment area. A/R/X/STIL Series Bullfrog Spas will require adequate access to door panel area. See diagram here. M Series spas will require adequate access to the entire front of the spa as well as the left front corner area of the spa. See diagram here.


It is always best to design in-ground installations so the spa can be moved or lifted from the ground if necessary. The use of non-corrosive lifting straps, left in place under the spa, is a best practice that can make future removal much easier.

External Features

Many Bullfrog Spas model have features on the outside of the spa that both provide the desired aesthetic and also allow for any future service needs.


A Series spa models feature sconce lights that are positioned on each corner. Position of these lights may vary based on model year. Please refer to the “Layout Views” for your specific spa. Spas installed with the lights below grade may require the removal of the sconce hood on earlier year models.


M Series & STIL spas feature an exterior light channel just below the lip. It is recommended that the spas be installed so that the grade or decking material not be above the aluminum rail that holds the exterior light.

Cover & Accessory Considerations

Hot tubs require a cover to help ensure energy efficiency and safety of the spa. In ground installations can present special needs to maintain the effectiveness of the cover. Most covers for Bullfrog Spas are 4” or 5” in height.


Cover clip attachments


Standard installation of cover clips includes attaching clips to the side of the spa cabinet below the lip of the spa. This is the preferred method as it will help in holding the cover tight to the spa and allows for a better seal against heat escaping or debris intrusion. Such an installation may require leaving space to access the area of the cabinet where the clip attaches.


Another option is to attach the cover clips to the decking material with screws or epoxy. This can be less favorable for sealing, aesthetics, and/or safety. Some installations have included notched surfaces or the ability to recess the clips and cover straps into the deck surface. While this may help with the aesthetics or safety the best method for sealing against the lip is to have the strap pulled straight down and the clip attached to the spa cabinet.


Cover Lift use


Cover lifts on an in-ground installation are less critical but can still help in removing the cover from the spa as well as keeping the cover close to the spa when the spa is in use, as well as making it easier to close after use.


Standard installation of cover lifts are normally on the side of the spa and attached to the cabinet material. In ground installations will either still require access to the side of the cabinet at the recommended lift installation location or a different type of lift.


For spas installed only partially in the ground a normal lift installation should be possible. For spas installed with decking material up to the lip it is recommended that a lift with a surface mount option be used.

Electrical Connections

Bullfrog Spas are designed to accommodate multiple options for connecting electrical power to the spa. Spa bases are equipped with chase-ways that have access points on the two sides and the rear of the base. These can still be used in an in-ground installation. It will be necessary to carefully consider how to run electrical wiring to the spa before the spa is placed underground.

Water Drainage

Bullfrog spas contain an equipment compartment, which houses all the spa’s electrical components. Allowing water into the equipment compartment can damage the electronics or may result in tripping of the spa’s circuit breaker. All spas installed in-ground will need adequate drainage to ensure that any water entering the recess for the spa does not enter the base area of the spa. This may require a plumbed drain as it is not recommended to rely only on soil drainage. Water in the recessed area can come from surface water like rain or sprinklers or an unforeseen event with the spa shell or plumbing.

Warranty

We do all we can to provide a quality product but there may be an occasion that require access to areas other than the equipment compartment. Service calls for any issues that may occur with your spa are assumed the spa is installed above ground. In the event the spa must be removed to perform service the cost to do so will be the responsibility of the spa owner. Normal warranty and services rates will apply once the spa is removed. 

Indoor hot tub installations

If you are planning on installing your hot tub indoors, the environment both around and below the spa should be water resistant, and preferably waterproof. It must be capable of handling water splashed out from the spa as well as the possibility of a malfunction. Recommendations to handle water around the spa include, but are not limited to, a floor drain and/or a catch basin equivalent to the volume of water in your spa.


Make sure the installation location is structurally sufficient and can support the weight of the spa when filled with water. Ground floor recommendations are generally preferred for indoors.


Condensation can also occur on the spa cover and drip onto the floor. Therefore, ensure that flooring materials provide a good grip when wet and are resilient to constant exposure of water and chemicals.


In addition to handling the water from the spa, it is recommended that the room be properly ventilated. Humidity levels will naturally increase after the spa is installed and in use. Water may get into woodwork and produce dry rot, mildew, or other problems. Over time, high levels of humidity and spa chemicals can cause water damage to your floor, wall, and ceiling surfaces. To minimize humidity damage, it is best to provide plenty of ventilation such as a ceiling fan and moisture-resistant paint. An architect can help to determine if special ventilation equipment is required, such as a humidistat or dehumidifier which can be installed to regulate indoor humidity during spa use.


NOTE: Typical indoor surfaces include, but are not limited to: concrete, wood, non-slip tile, or linoleum.

Elevated hot tub installations

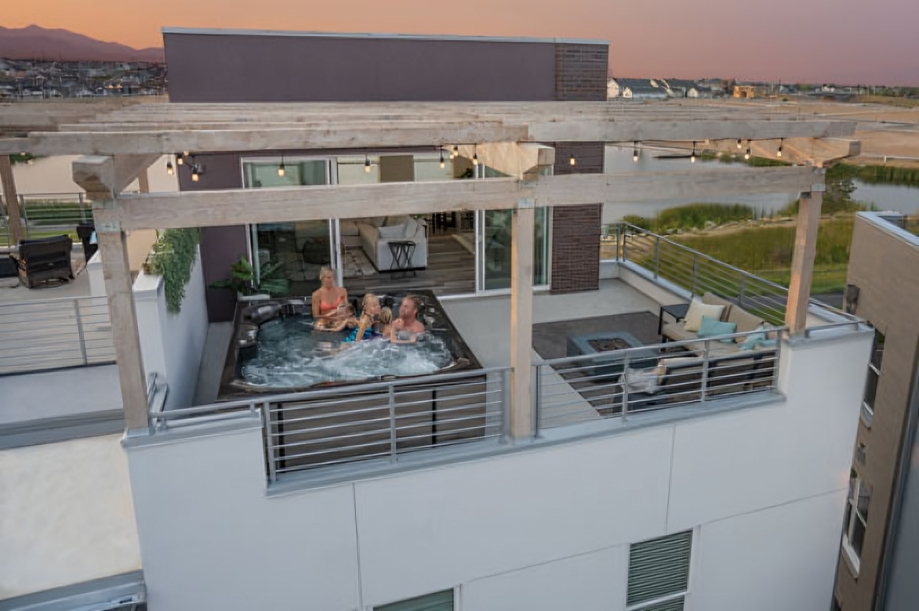
If you’re looking to install your spa on a deck or other elevated structure, consult with a qualified structural engineer or contractor before installation.


Be certain your deck or elevated structure can support the maximum filled weight of your spa along with the total weight of occupants that use it. You must know the deck’s weight-bearing load capacity and ensure that it is greater than the maximum filled weight of your spa combined with the occupants using it or serious injury or structural damage could result. To find the weight bearing load requirement along with the maximum filled weight of your spa, refer to the Spa Technical Specifications Chart or contact an authorized Bullfrog Spa dealer.
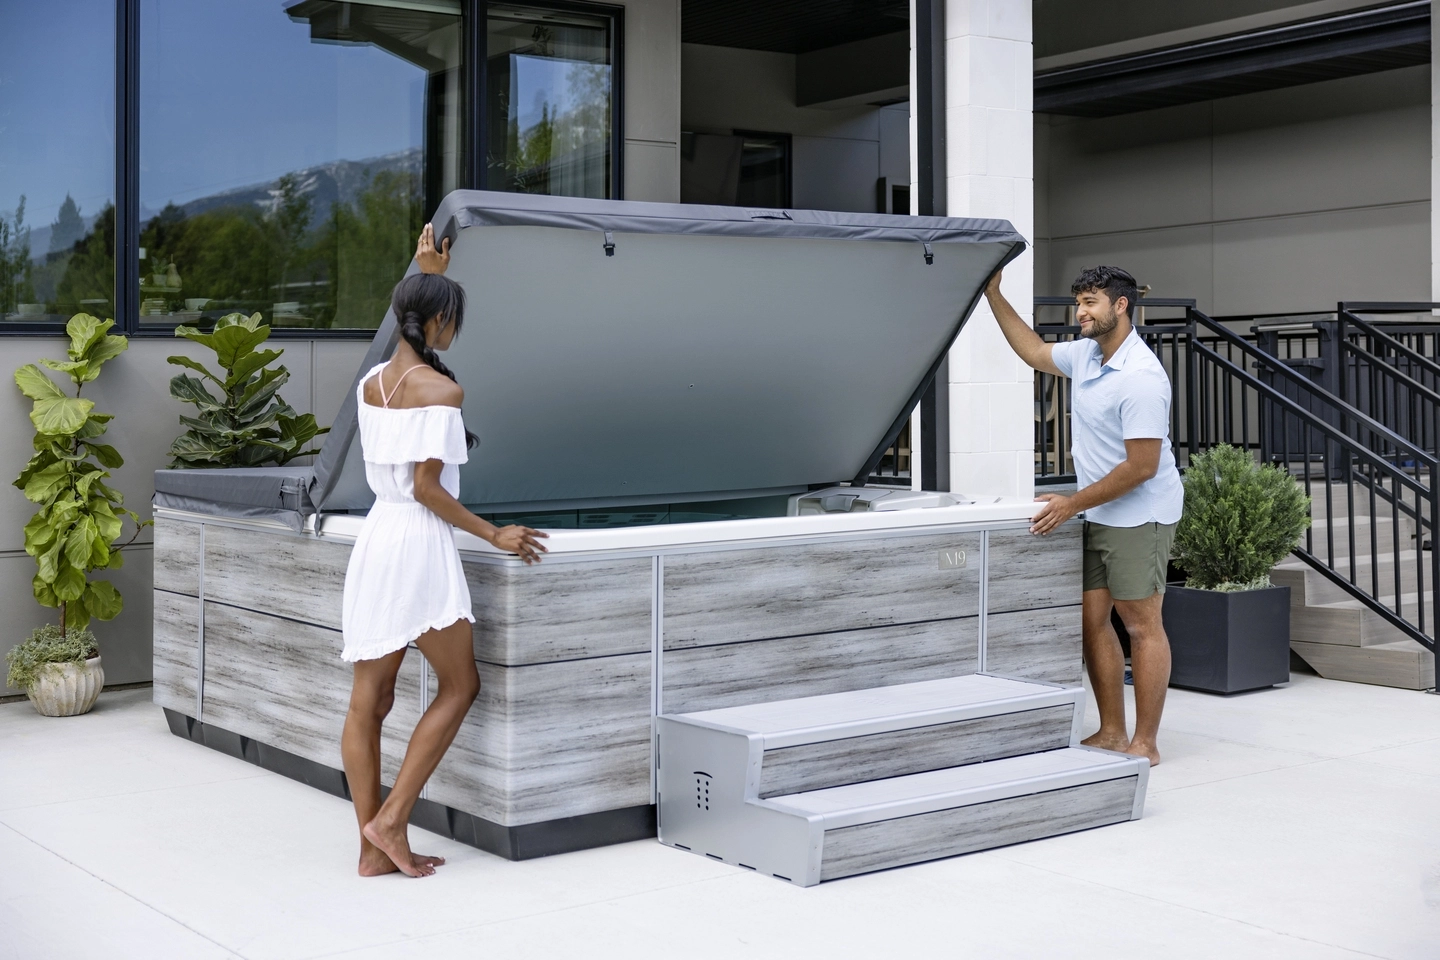
Delivery Preparation & Requirements

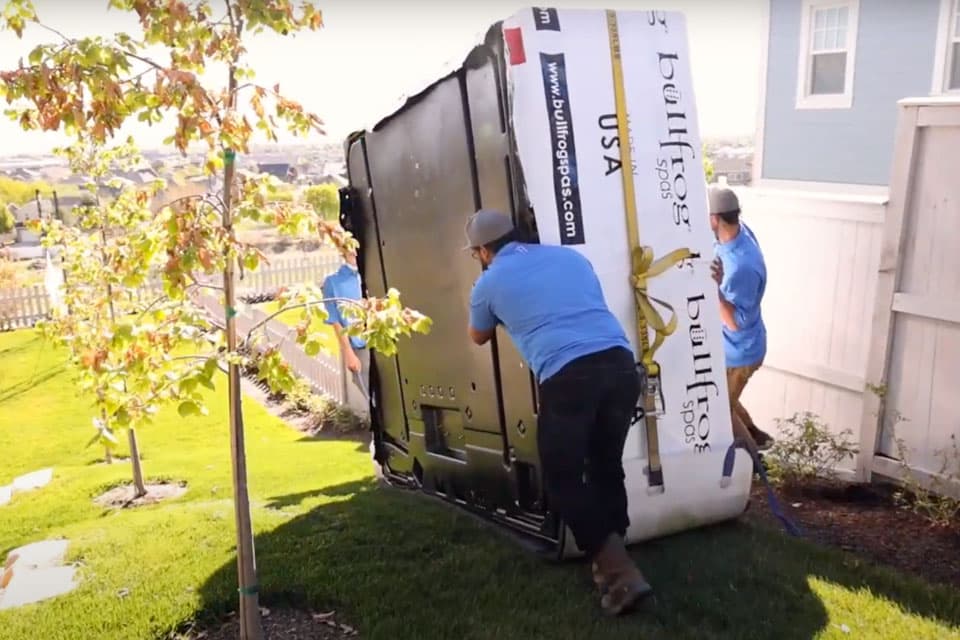
Hot tub delivery basics

To prepare for the delivery of your hot tub, make sure the delivery path is clear and no obstructions are present. Obstacles such as overhanging tree limbs, awnings, protruding gas meters, water meters, and A/C units can prevent easy access. It may be necessary to remove a gate, part of a fence, or other items in order to move the spa to the desired location. If there are more than six consecutive stairs without a landing, you may be required to find another delivery path. Check the measurements on 90◦ turns to make sure the spa will fit through.


Most spas are moved using a dolly or slip sheet, but occasionally a crane is required to install the spa by lifting it to its final destination. This occurs when the spa has to be taken off of the dolly cart to go over a wall, either because the entry area is too narrow, the eaves are too low, the corner is too tight, or the stairway is too steep. The use of a crane is a common practice and is usually the easiest and safest method for moving a spa when access is difficult. The crane has a truck-mounted boom and can fit easily in your driveway. The Crane Operator will lift your spa over walls, buildings, or any other obstruction and place it as close to the installation site as possible.


The chart below can help you visualize possible obstacles to identify before your spa is delivered. Let your dealer know of any potential issues and they may want to come inspect your site before delivery.

A – Obstacles such as overhanging tree limbs, awnings, protruding gas meters, water meters, and A/C units can prevent easy access.

B – WARNING: Watch for power lines.

C – It may be necessary to remove a gate, part of a fence, or other items in order to dolly the spa to the desired location.

D – Check the measurements on 90◦ turns to make sure the spa will fit through.

E – If there are more than six consecutive stairs without a landing, you may be required to find another delivery path.

Depending on access to the spa site, your spa may be dollied in either horizontal or vertical position. For your convenience, these charts provide the dimensions of your spa in either the horizontal or vertical position.


NOTE: The height of the cart used to dolly your spa into position will need to be added to the height of your spa when calculating the total height clearance required to complete your delivery. Spa carts are typically around 6” (15.24cm) in height. (If necessary, see your authorized Bullfrog Spa dealer for the exact height.)
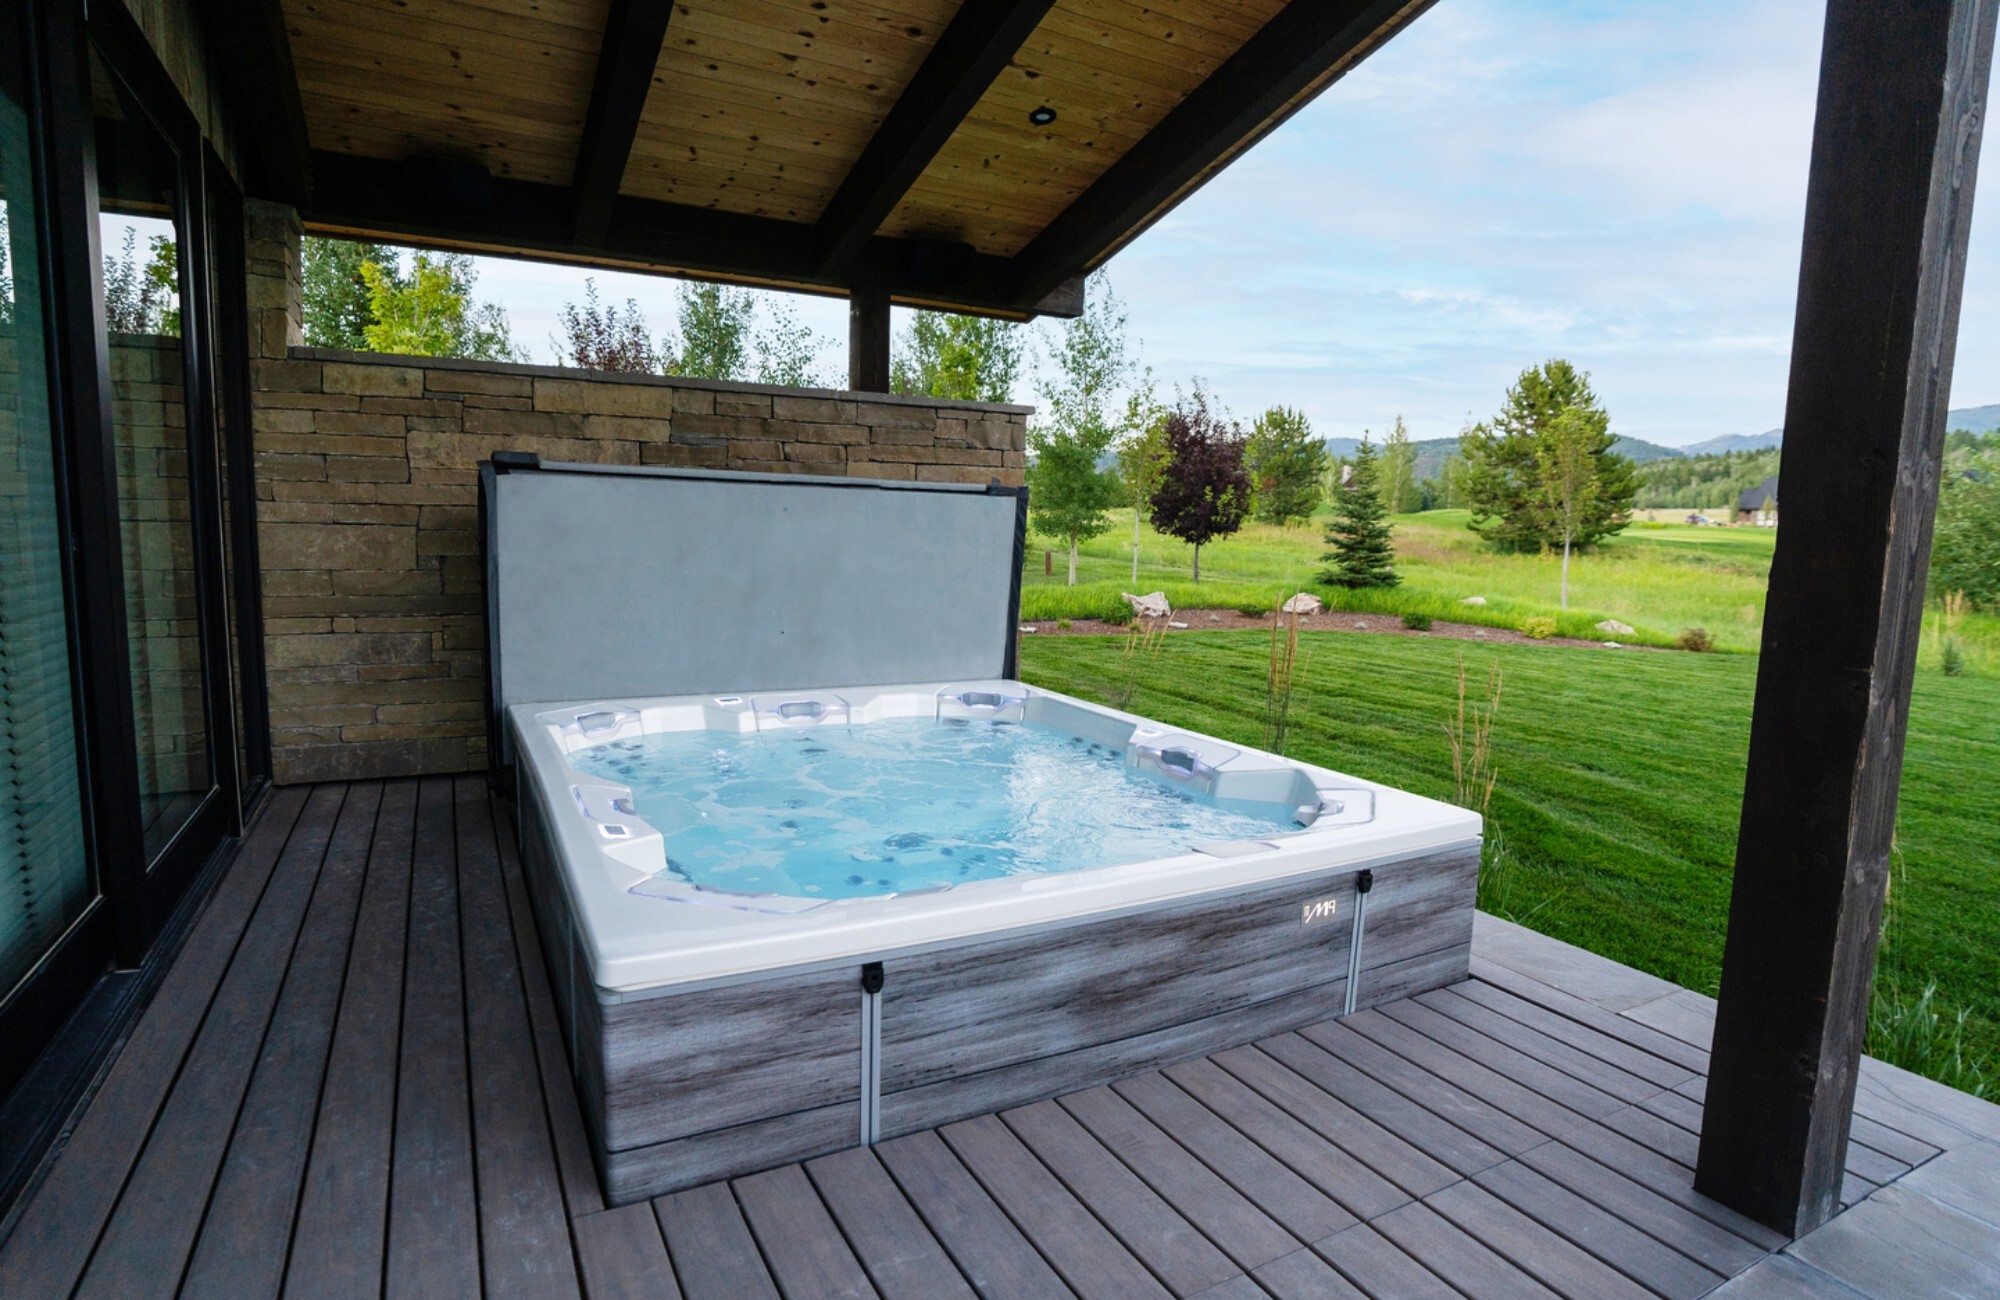
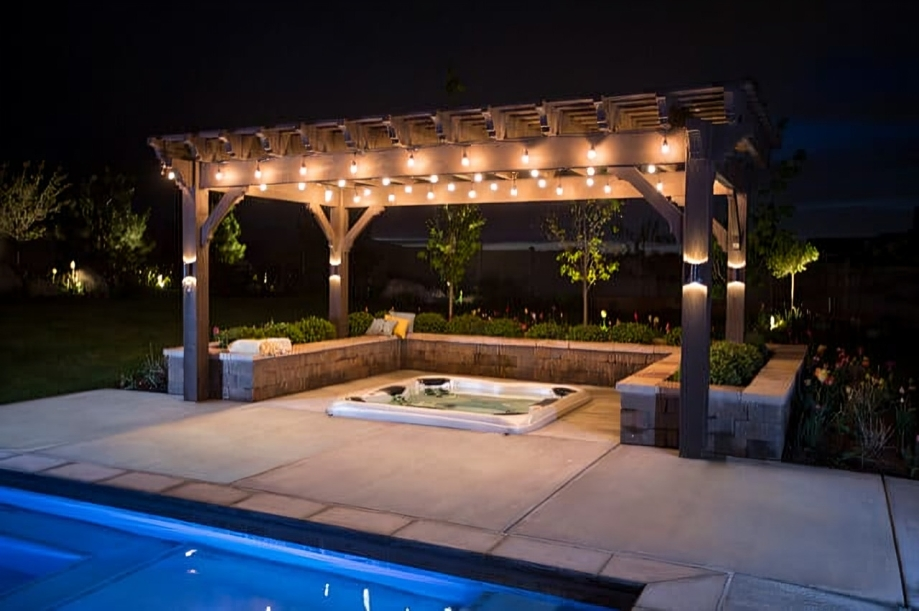
When will my spa be delivered?

Your local dealer from whom you placed your spa order will be able to update you in regards to estimated ship and delivery dates. Ship and delivery times can depend on a variety of factors, including the current number of spa orders, shipping time from the factory to your dealer, and the availability of your dealer to deliver your spa to you.

Connecting the electrical service to the spa

Most dealers should be able to connect the electrical service to the spa for you when they deliver it if you already had an electrician come set up the electrical source and wire.


IMPORTANT: Installation must be in accordance with all national and local wiring rules and performed by a licensed Electrician. See Electrical Conduit Diagram before proceeding.


Here are the 8 steps to connecting your electrical service to the spa:


Step 1: Choose one of the three available conduit entry points. (Yellow Black decal)

Step 2: Determine the conduit diameter and drill a hole that is properly sized for the conduit (¾” conduit drill 1-1/8” hole, 1” conduit drill 1-3/8” hole). Use the + as the locator for the center of the hole. The hole saw must go through two layers of plastic. There is a 1” space between both layers.

Step 3: Push the conduit through the hole until it comes out into the equipment area.

Step 4: Remove the faceplate to the Control System Box

Step 5: Connect the conduit to the Control System Box using a Liquid Tight Connector.

Step 6: Run the required wires through the conduit to the Control System Box.

Step 7: Connect the electrical service wires to the terminal block located in the Control System Box.

Step 8: Replace the Control System Box faceplate and the equipment compartment door. The electrical hook-up is complete.

Filling the spa & initial startup

After your spa is delivered by your dealer, your dealer can show you how to properly fill up your spa with water and give instructions for initial startup. Instructions are also found in your owner’s manual. Do not run your spa when it is not filled with water. Both your dealer and the manual can walk you through the controls of operating your spa and programming the different settings. It usually takes between 24-48 hours for your spa to reach desired temperature before use.


Our spa maintenance guide also has helpful tips on taking care of your spa.

Hot Tub Installation Design Ideas

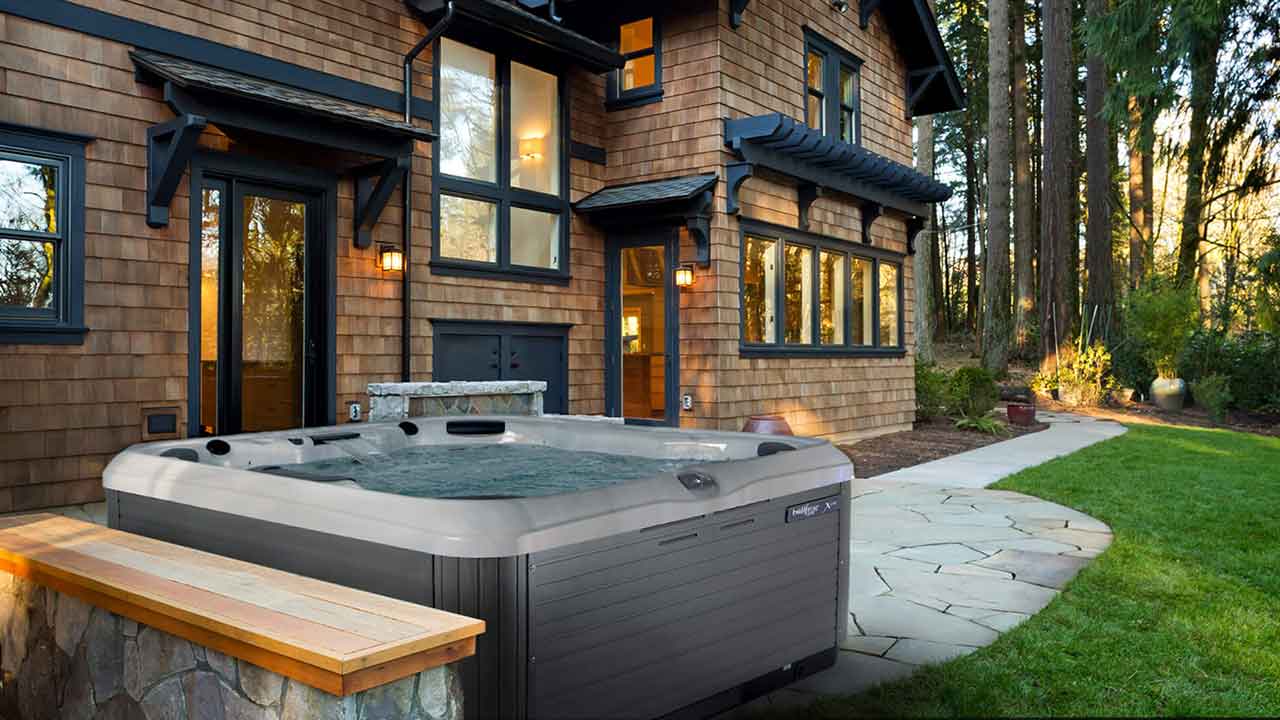
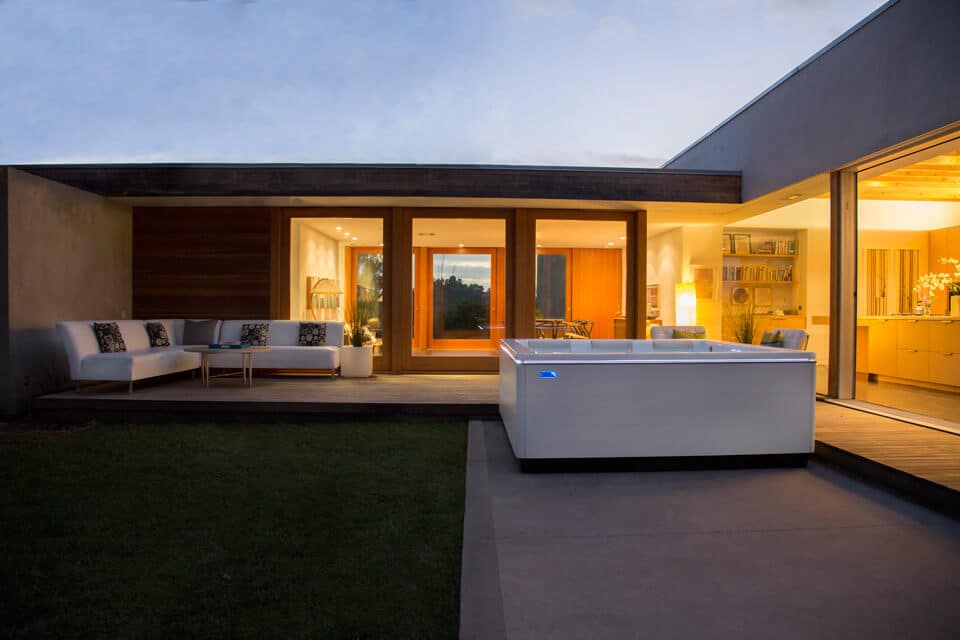
In addition to selecting a hard surface that meets the recommended safety and maintenance criteria, consider textures and colors that will assist in enhancing the aesthetics of the area in which your spa will be installed. The decision to match, contrast, or blend the hard surface colors and textures with those of your spa should only be made after carefully researching your options.


The correct landscape around your spa will not only soften the adjacent hard surface areas, but will add life and much enjoyment to the environment. If the budget allows, you may want to consult with a Landscape Architect for expert advice.


Besides selecting the correct hard surfaces and landscape around your spa, the addition of the proper spa-side accessories will provide just the finishing touch that you are looking for. Spa steps, benches, towel racks, planter boxes, or an outdoor fireplace are just a few of the items that can be considered when accessorizing your spa.


Here are a few resources to help you brainstorm ideas for your spa environment:


63 Hot Tub Deck Ideas


Ultimate Guide to Gazebos, Pergolas, and Surrounds

Additional Resources

New call-to-action